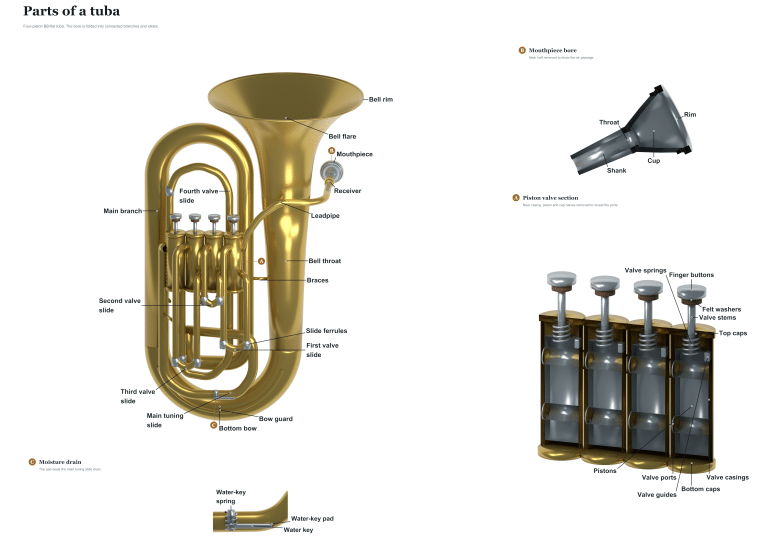
Positioned halfway between the warm richness of a tuba and the brilliant sound of a trumpet sits another brass instrument; the French horn. Playing this instrument demand finger dexterity, lip strength and breath control to create a mellow tone.
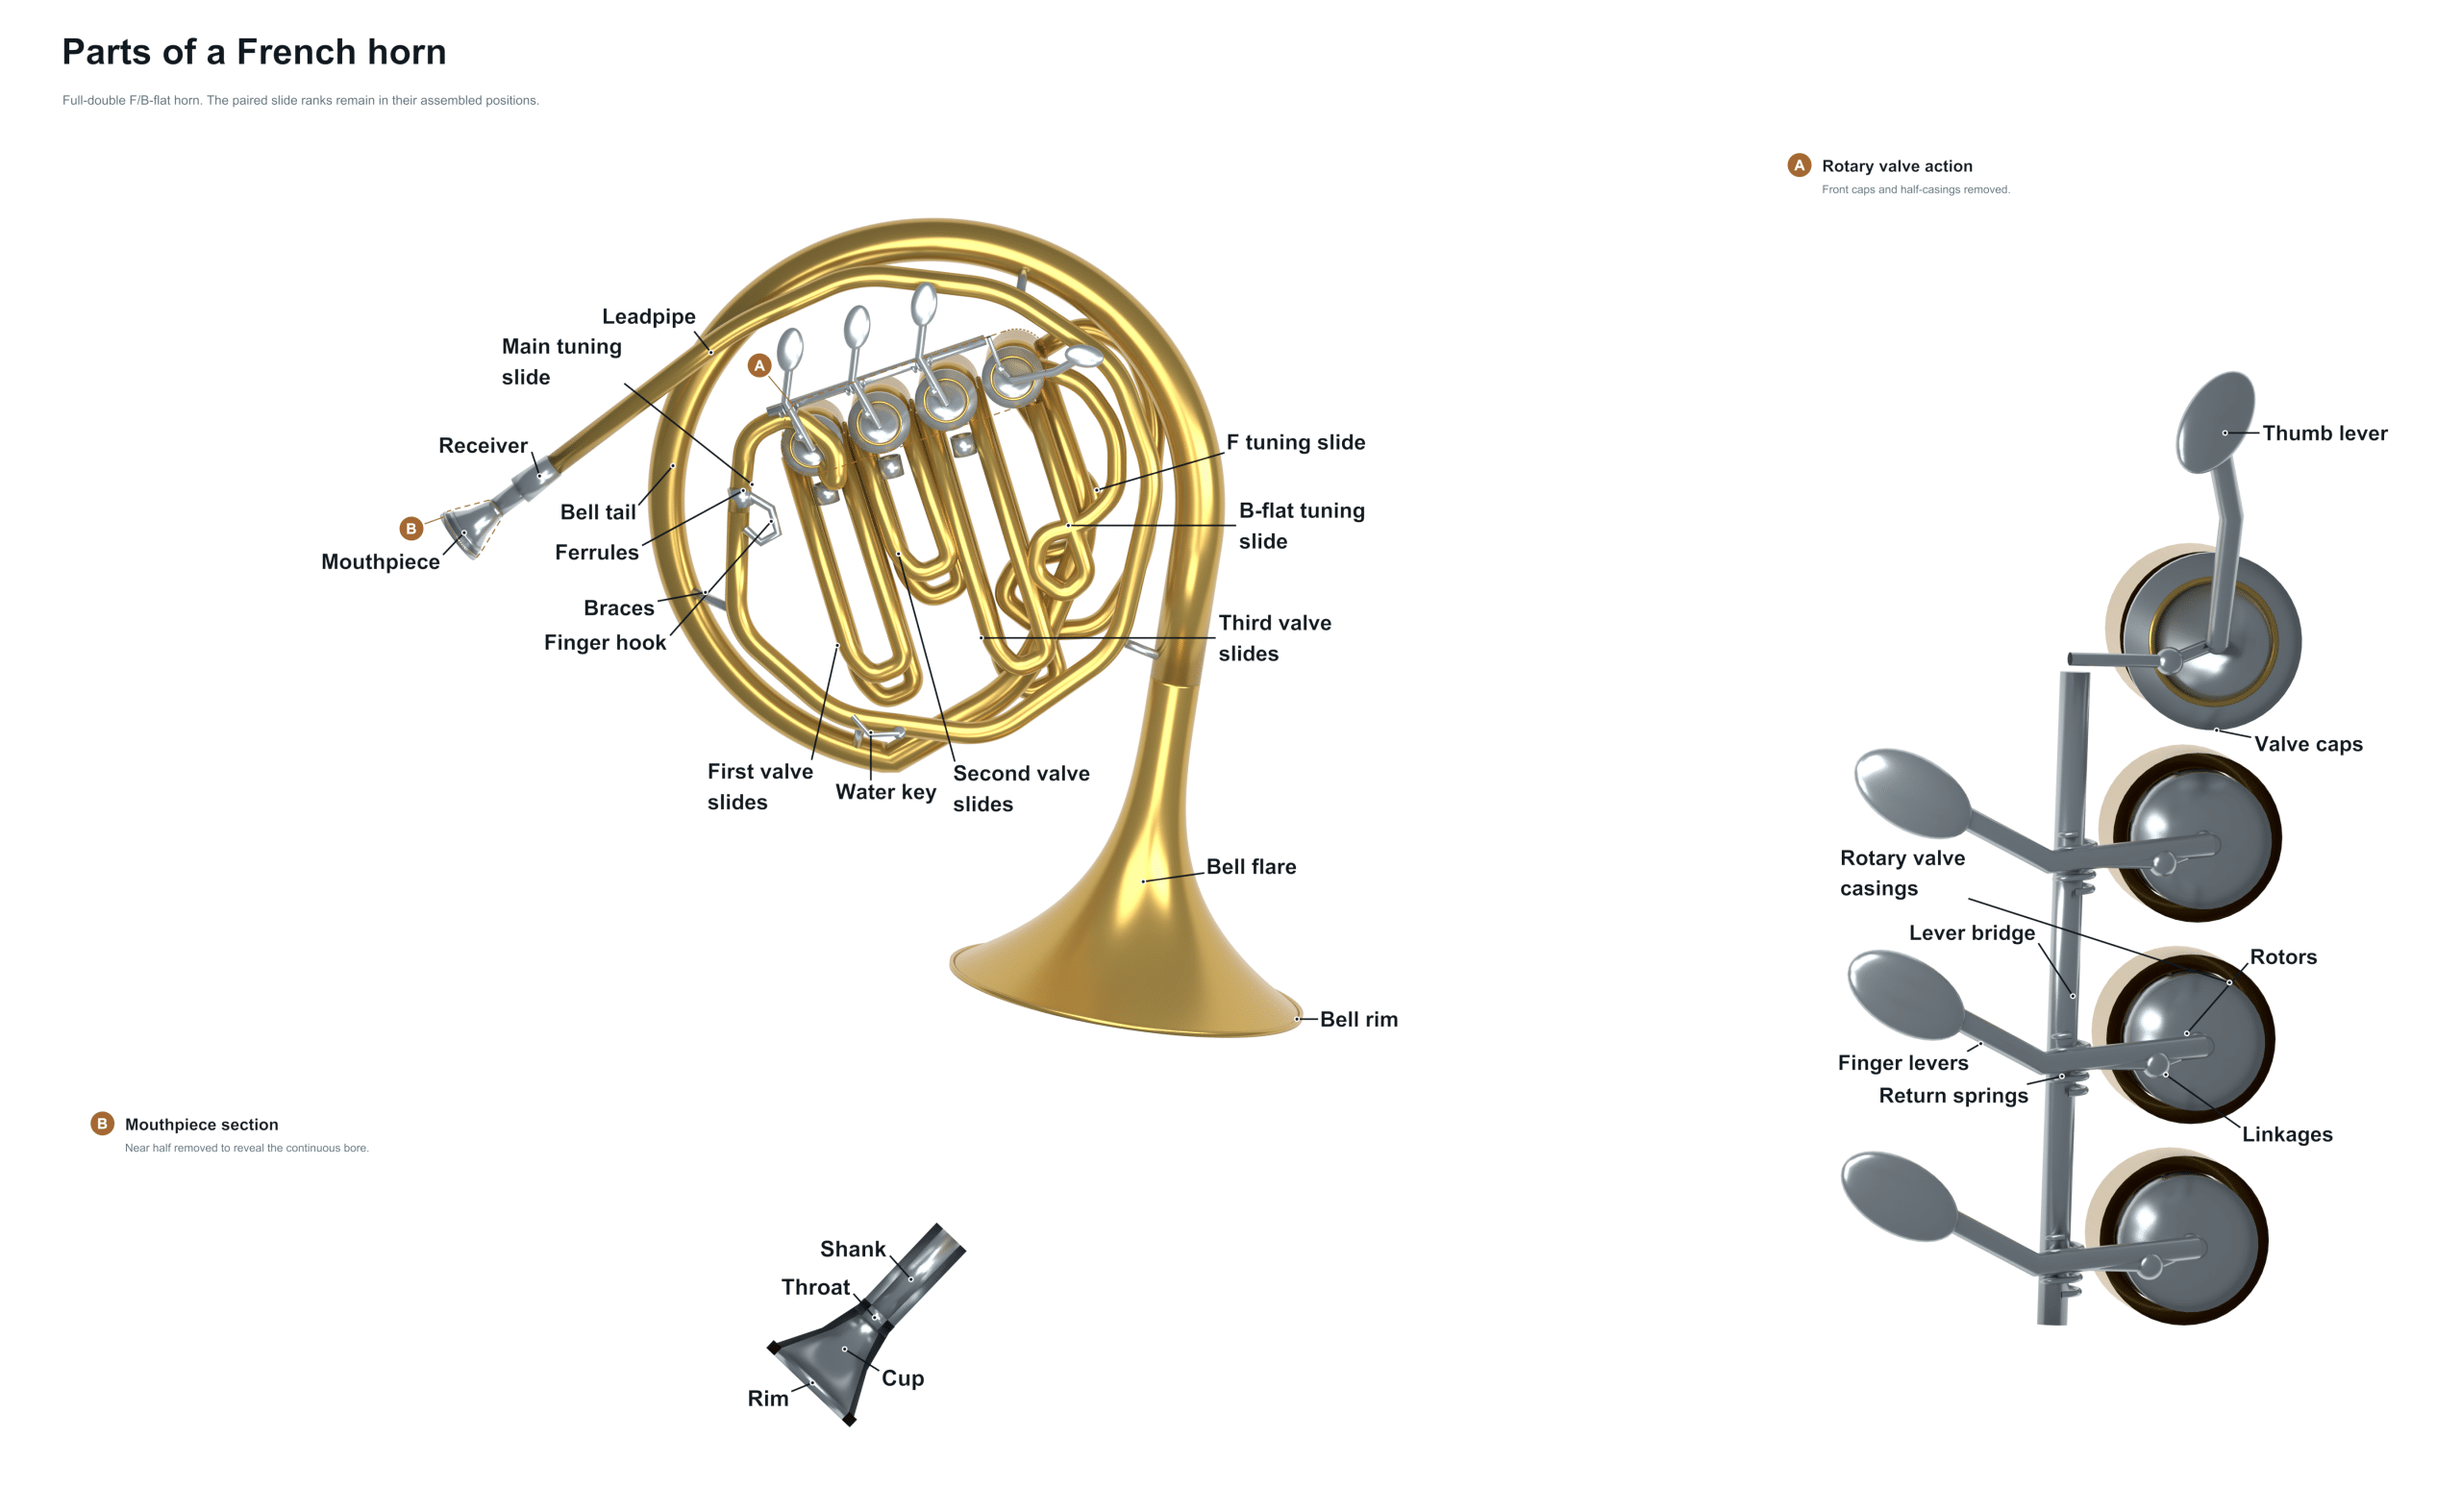
To understand its mechanics it’s useful to know something about the physical build of an instrument. This diagram shows the main parts of a typical double horn. Each part is clearly marked so you have an idea of where everything goes and how air flows from mouthpiece to bell. From here you can hear how your actions influence the end result.
The Parts of a French Horn
Mouthpiece
Each note is played through the mouthpiece. You place this small, cup-shaped brass component against your lips to vibrate the air column. Selecting a mouthpiece that matches your embouchure is essential. Mouthpieces comes in different diameters and depths that affect both your sound and your playing comfort.
Leadpipe
Connecting the mouthpiece to the rest of the horn is the leadpipe. It’s a thin tube that brings the first rush of air straight into the horn. As you’d expect, it’s an important conduit for clear sound with its taper and length influencing intonation and response in the upper registers.
Main tubing
The remainder of the horn consists of main tubing. This is the long, twisting piece of metal that directs the sound waves towards the bell. How it’s laid out determines the harmony series and overall pitch of the horn.
Rotor valves
Unlike the trumpets which has piston valves, the horn has what is known as rotor valves. The rotor valves consist of a cylinder that spins within the valve block and diverts the airflow to varying lengths of tubing depending on which key is engaged. This means that it can produce a complete chromatic scale. This makes the instrument capable of playing any note available in the musical range.
The external levers that you play with your fingertips that trigger the rotor valves are called lever keys. These are played with your ring finger, middle finger and thumb. They are designed so that they can be easily moved from note to note smoothly and quickly.
Valve cap
The valve cap is the removable cover on top of the rotor valve mechanism. To get at the inside parts for maintenance and cleaning, you remove the valve cap. Make sure the area under the cap is clear of junk so the rotors spin freely and quiet.
Valve slides
The adjustable tubes linked to the rotor valve system are called Valve slides. By pulling these slightly, you drop the overall pitch of the instrument. Often, you will find yourself regularly adjusting the valve slide to make up for the variation in intonation caused by different mouthpieces and varying temperatures. In common speech, the phrase ‘valve slides‘ can be interchangeable with the tuning slide which is realy the main tuning device on an instrument. This slide is what you adjust when tuning your instrument to a given pitch (e.g. A440. Being tuned and keeping in time is vital for playing together as an ensemble.
Bell
At the far end of the instrument you’ll notice a large flaring hole called the bell. This forms the tone quality of the sound and projects it out into the space. How warm and loud this horn can be depends largely on the size of the bell and how much it flares out. The shape of the outer edge or rim of the bell is called the bell flare. The sharper the flare the brighter it will project and more gradual the flare the darker and softer the sound tends to be. This is one of the important elements that form the voice of the instrument.
Bell throat
The narrowing section between the main tubing and the bell itself is called the bell throat. It’s this area that determines how consistent a tone is throughout the instrument as well as its responsiveness to being played. A good design allow higher notes to be played easily and clearly.
You’ll notice the bell and, near it on the left side of the horn, a small platform called the hand rest. This is where you place your left hand when playing the horn to provide a degree of stability while holding the instrument. This also assists with distributing the weight of the horn, making it less fatiguing over time in performance or practice.
Lever keys
Close to the keys are the lever keys for your pinky finger. On these sits the finger hook, a metal loop that gives you a lot of control over the position of the horn. This helps you hold it so it does not turn in your hand. On other models, the pinky hook is in a slightly different position. It plays a similar stabilizing role, but it also gives you another anchor point in your hand to help you move your fingers on the valve keys. The correct positioning of the hands on the hooks enhances technical accuracy.
Rotor valve
The rotor valve is a separate mechanical component. Each rotor corresponds to a specific key and length of tubing. The valves does need regular servicing as they can become worn and leak air if not maintained well. To reinforce the link between you and the mechanism, we mention the lever key once more. On different instruments, the feel of this key will differ. If it is too loose or too tight for your way of playing then the spring tension should of been adjusted accordingly.
Knowing this will enable you to care for your instrument properly. When you feel that your horn is out of tune or has started to get stuffy, then inspecting the rotors and valve slides is a sensible place to start.
Knowing the diagram enables you to be clearer in conversation with teachers and repair technicians. It also makes you a more capable and informed musician. You know what happens and where things are on your French Horn. The valves, tubing, and mouthpiece combine to produce the unique sound of the French Horn. Care for your instrument, keep it clean and in tune, and you’ll be rewarded with consistent playing.