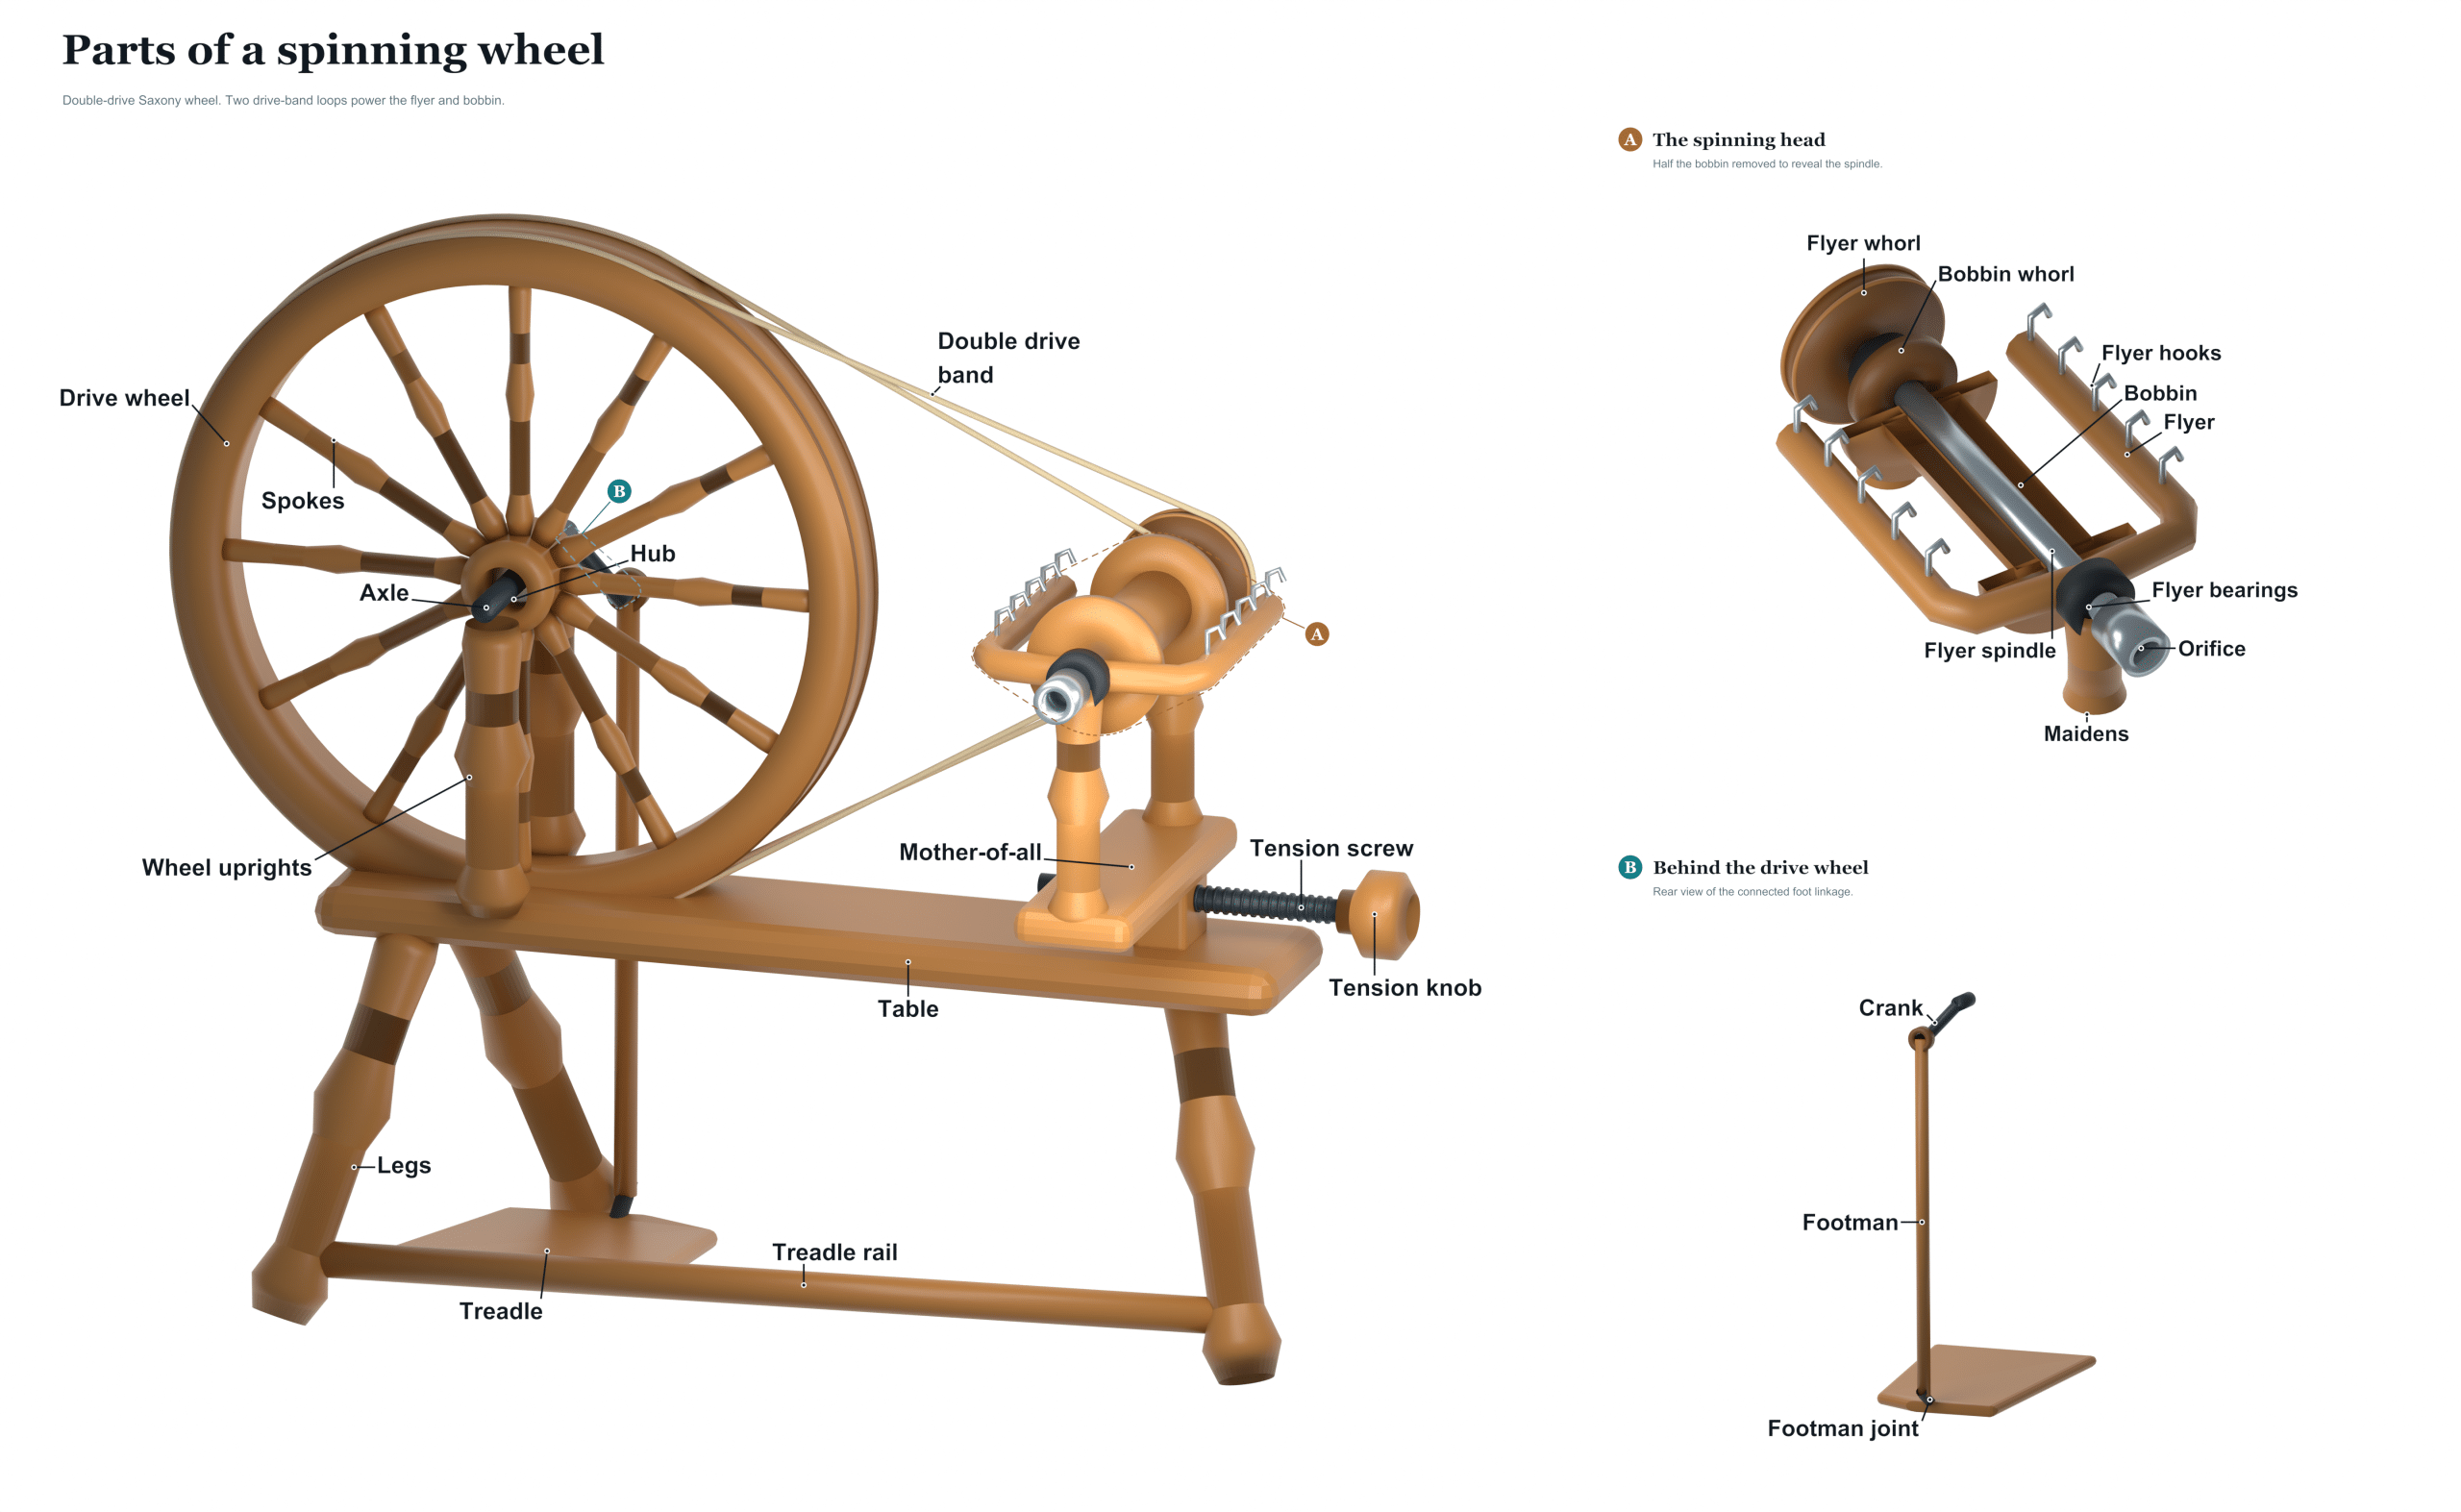
This is how a spinning wheel works: Raw fiber is fed into the spinning wheel, which spin and creates a continuous length of thread. Mechanical leverage twists the fibers together while simultaneously winding them onto a spindle for storage. Although it might seem complicated, the mechanism is simple, just a series of levers and wheels that rotate to create your yarn. To learn more about the pieces, use the labeled diagram above to follow along. Knowing the components will allow you to work the wheel safely and care for it over time.
This is the Base, it provide the necessary stability for the entire apparatus. This is what keeps everything stable so you can work without any movement or wobble. If the wheel isn’t attached to a solid base, none of this will be effective. Much of your foot power will go towards shaking the whole thing instead of making the wheel spin smoothy.
Parts of a Spinning Wheel
Table
The Table rests on the base. It’s a horizontal surface to hold whatever tools/materials you need to have at hand while working. The table supports the distaff and any container/baskets you wish to use to hold raw fiber. Your work area remains tidy and you can easily reach fiber to feed it into the wheel without having to bend over.
Footman
Connecting the lower section of the wheel to the upper sections is what we call the Footman. This is essentially a support column that transmit the power you exert on your foot down into the drive system. This piece needs to be solid and sturdi to withstand the pressure and weight of your treadling action.
Treadle
The Treadle (a horizontal bar) is pressed downward by your foot to power the wheel. Depending on its shape and length, this will vary how comfortable and leveraged you are when operating the machine. For long spinning sessions it helps if you find a rhythm that matches your stride.
Drive wheel
The main component at the top of the assembly is the large Drive Wheel. As you step on the treadle, it rolls and stores kinetic energy in its mass. The bigger the drive wheel, the higher the gear ratio which means that the spindle will turn faster then your foot pedal does. It’s important to have a tight band around this wheel so that power can be transfered well.
Maiden
A Maiden is the tall upright frame on which the upper spindle and drive wheel are mounted. The maiden supports the alignment and tension of all the moving parts. A slight damage to the maiden or a slight bow in the maiden can result in slipping band off the drive wheel or wobbling of the wheel itself.
Mother-of-all
From the maiden, a horizontal arm called the Mother-of-All reaches out and supports the whorl assembly. The bobbin and the flyer is attached here so they can spin freely, supported by this part. Often the Mother-of-All will have an adjustable slot. This slot adjusts the distance between the distaff and the orifice depending on the length of your fiber.
Distaff
A distaff is the rack or pole that holds your supply of raw fiber. Whether it’s cotton or wool, keeping it close to your hands makes it easier to work with. When you secure your fiber in this way, you have control over the amount of fiber you’re going to draft at once.
Spindle
The spindle is the main rod that spins within the bobbin. It take the twist from the flyer and transfers it into the thread. The size of the whorl you choose will determine how fast the spindle spins and, in turn, what you can draft and ply.
Orifice
The orifice is the little hole that the thread passes through on the flyer assembly. It serves as a guide for the yarn in order to wind it evenly onto the bobbin. If you have your orifice positioned properly, your yarn should not tangle up and will be twisted correctly all the way down the thread.
Flyer
As the fiber is drawn through the orifice, it’s twisted by the Flyer, which is a U-shaped metal piece that spins around the spindle, winding the completed yarn onto the bobbin. The points on the flyer may affect the smoothness with which the thread moves and how fast it is wrapped.
Bobbin
Inside the flyer rotates the bobbin, which winds the yarn onto itself. Depending on how tight you set the tension, it will spin a bit faster or slower than the flyer. The differential speed causes the gap needed to wind the yarn on without breaking it.
Tension knob
The Tension Knob controls how fast it winds. This is how you control the tension on your bobbin and can stop the spinning when you want to draft some more fiber. You’ll need to find a good balance of tension so that your yarn doesn’t slip but also doesn’t get too tight and break.
It’s all a well-oiled machine. Your hands handle tension and fiber; the foot moves the wheel, which spins the spindle and flyer. When you’re having trouble getting the wheel to spin smoothly or if you’re breaking lots of yarn, take a peek at the orifice and the band tension. Keeping these pieces well maintained will give you a pleasant and easy time spinning.