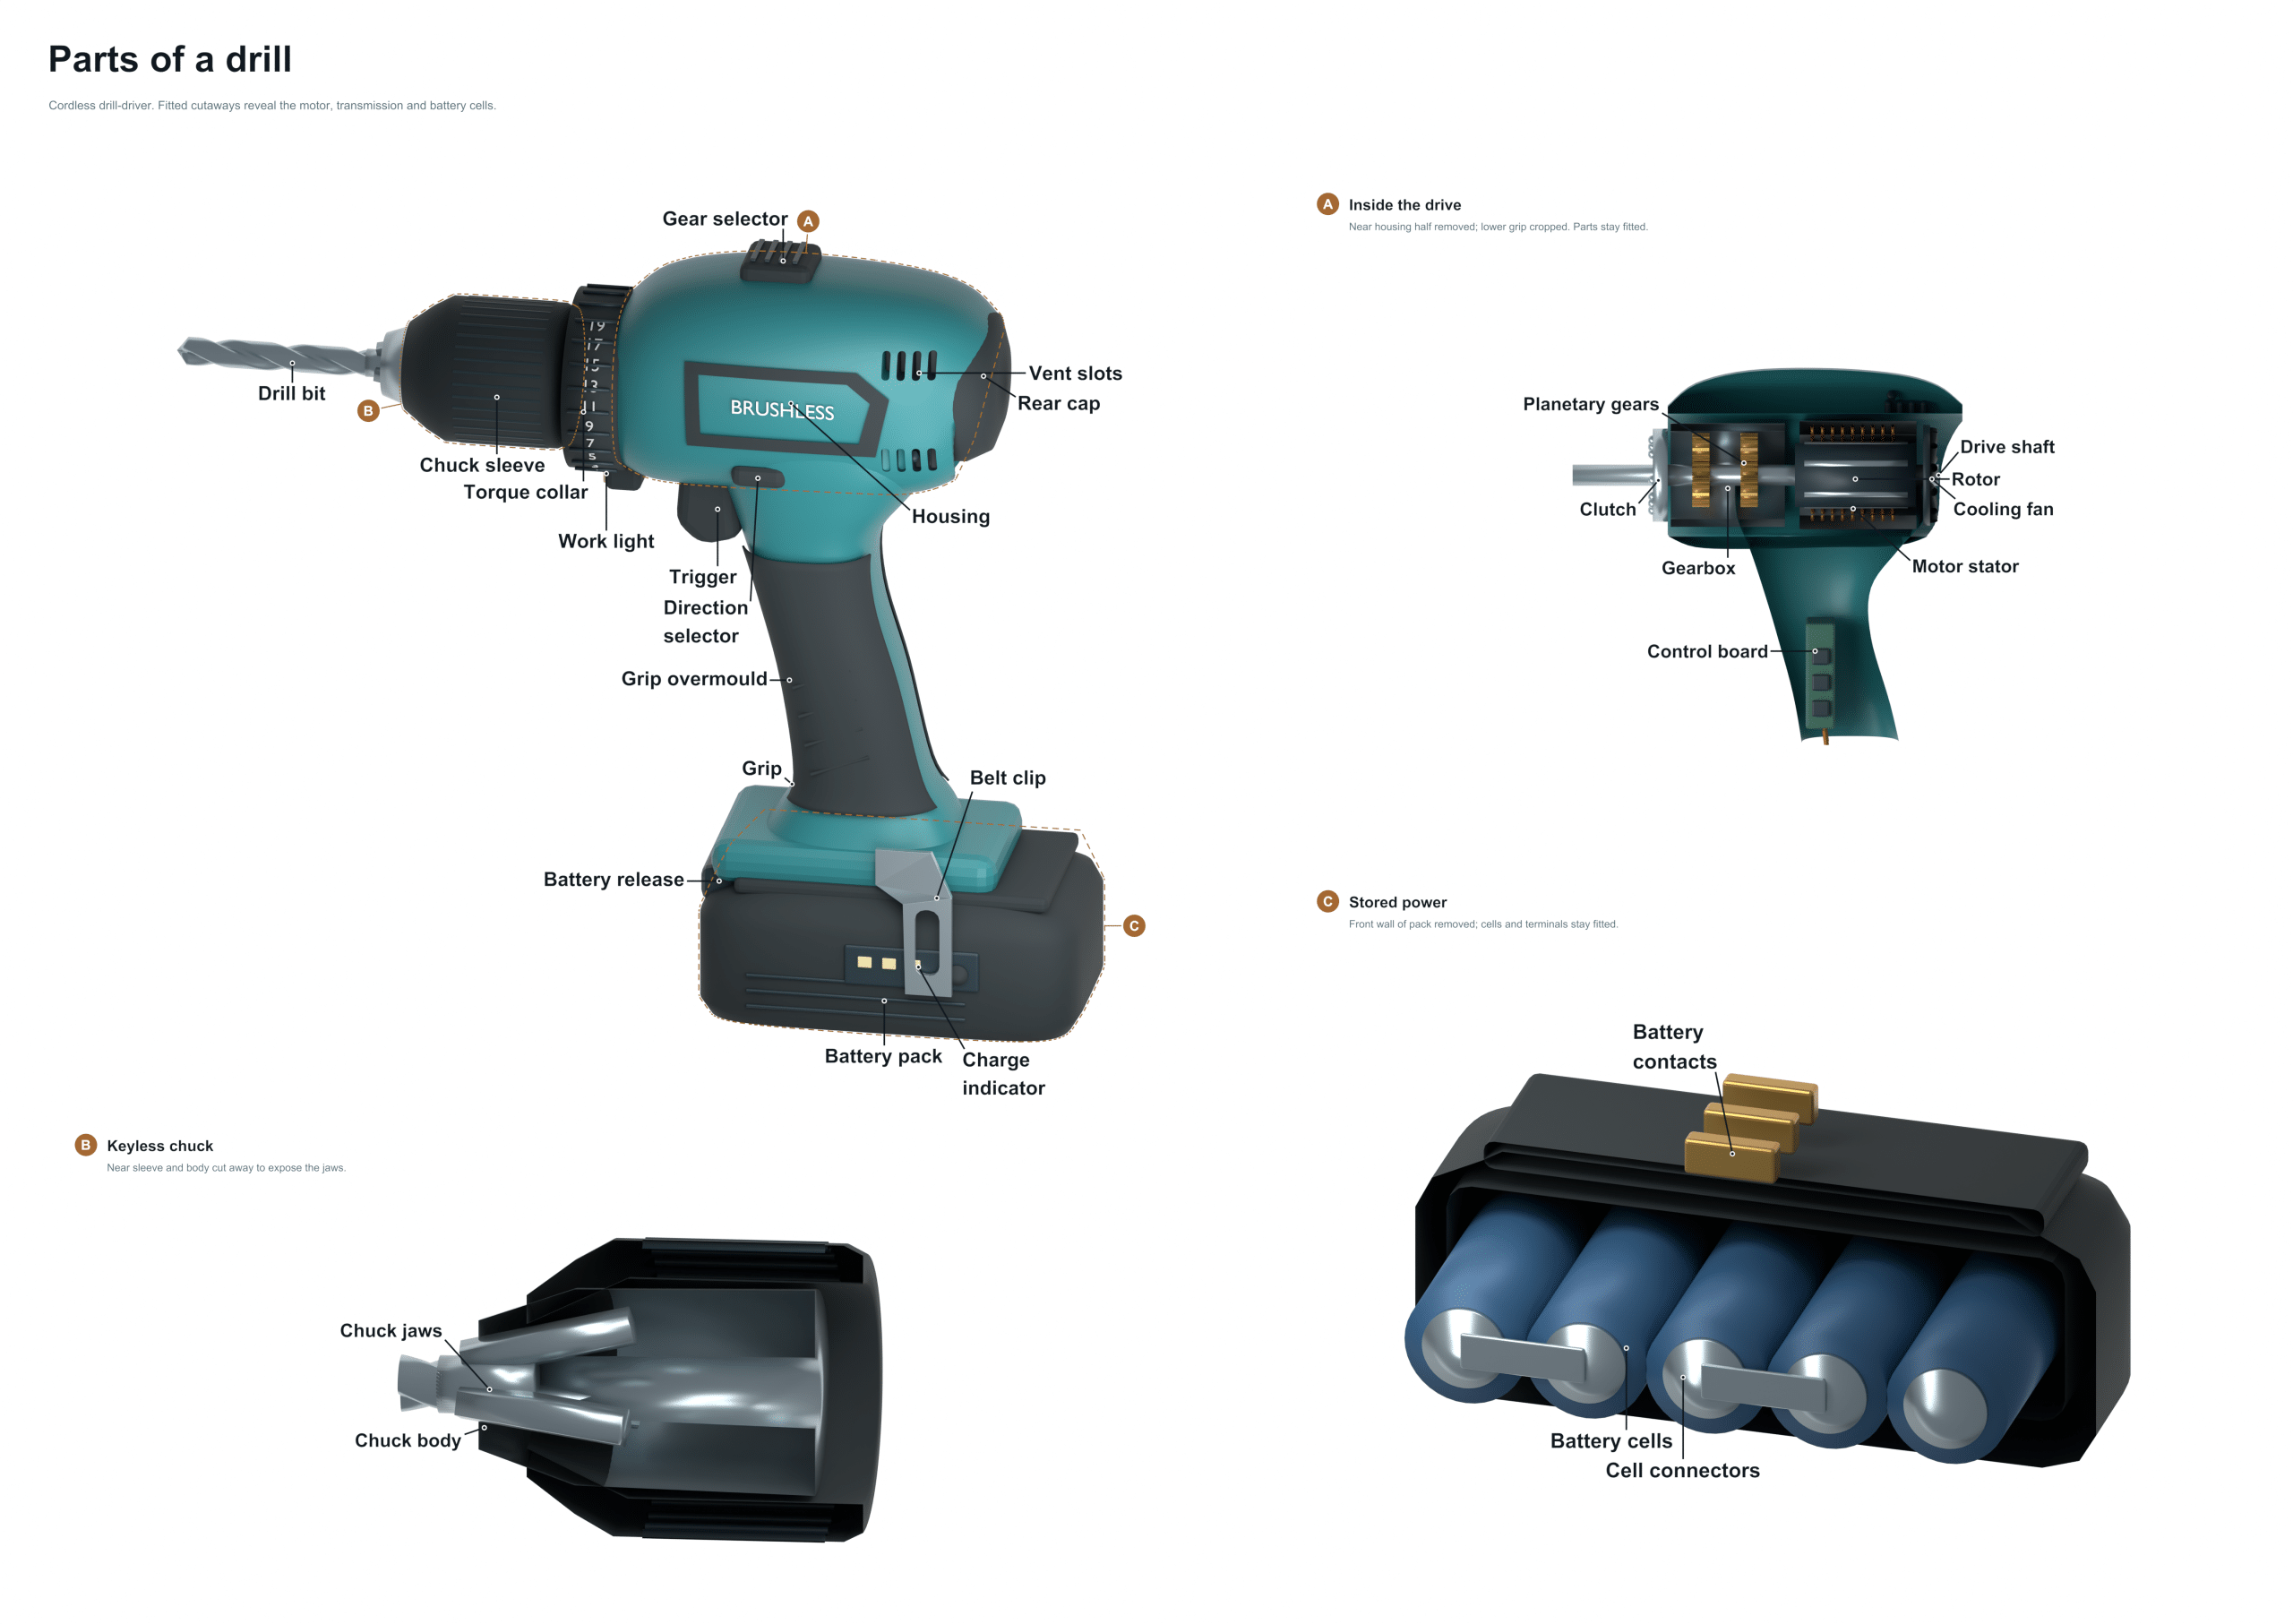
The garage/workshop has become a place of many tools… And none more versatile than a cordless drill. Featuring interchangeable bits that allow it to both drill out holes and screw in screws; and adjust torque for different projects as needed. To use your tool effectivey, you should be familiar with its components. Here’s what they are and where they go (front-to-back).
At the front end is the chuck that hold the screwdriver or drill bit in place. Its job is to hold the shank firmly and pass twisting force from the tool into the material being worked on. Chucks is typically keyless, meaning you just turn it with your hands to switch out bit. Inside the chuck are the jaws. They’re usually made of metal teeth that grab onto the bit when the outside sleeve is turned. Dirty or worn-out jaws could cause the bit to wobble. Clean ’em up or swap them for a good grip.
The Parts of a Cordless Drill
Chuck
Behind the chuck, you have the clutch ring. There are numbered settings on this ring that set the torque. When there’s resistance, the ring slip. This acts as a safety to prevent you from over-tightening screws or stripping out a screw head. It is perfect for working with more delicate materials different than drywall.
Torque Ring
Working with the clutch system is the torque ring. With the right amount of force applied, you can set the proper amount of pressure to seat the fastener without harming the material.
Gearbox
Inside the main body is the gearbox that take a high-speed turn of the motor and converts it to usable torque. You need to slow the speed and increase the turning force when working with harder material. If it’s quiet, that’s good. Grind means your gears are wearing out internally.
This is designed to protect all the parts from impact and dust and dissipate heat. Keep the vent free of sawdust so it doesn’t overheat. This will extend the life of the motor.
Forward/Reverse Switch
On the housing’s side, there’s a forward/reverse switch that turns the bit around. To drill screws, flip this switch to forward. For removing screws, flip back to reverse. That makes it easy to correct your mistakes without needing another tool.
Speed Selector
Near the switch is the speed selector. With it you can select from two different speeds. One gives more torque when driving in screws; the other is better for drilling metal and wood. Choose the right speed to work well.
Trigger
Trigger, That’s the trigger that engages the motor. You press it with your finger. The speed is typically variable, meaning if you push harder, it will go faster. Gives you total control over how fast a hole starts. You can start slow and then increase speed as needed.
It fits comfortabley in your hand. Has a textured feel to keep it stable. Moves your force effectively into the tool. Reduces fatigue. Keeps the drill from slipping
LED Light
The drill has an LED light just under the nose. It illuminates the work area. When working in shadows or darkness you can see where the bit makes contact with the work surface. This increases safety and accuracy.
Battery Pack
Attached to the bottom of the grip is the battery pack that drive the motor. Your battery pack determines how much power and run time you get from your drill. Keep the battery in a dry cool storage location. Don’t let it drain fully, as this extends the life of the battery over multiple charges.
Belt Clip
There’s a belt clip on either the handle or battery. Hang the drill from a rack or on your belt. It is within reach. Your hands are free to get the job done. It is adjustable and secure. You won’t drop it in a busy shop.
It is an efficient tool. Knowing how the chuck, gearbox and battery operate helps diagnose issues better. Inspecting battery contacts, clutch and jaws regularly keeps the drill safe and reliable.